2014年11月30日日曜日

distAuth冗長化

事前にLB(apache2.2のhttpd.conf)に以下の設定をしておく。(apache再起動要)

~~ ここから ~~

ProxyRequests off
ProxyPreserveHost on
<Proxy *>
    order deny,allow
    Allow from all
</Proxy>
<Proxy balancer://distauth>
    BalancerMember http://sol10-distauth1.openam.net:8080 retry=300 route=server1
    BalancerMember http://sol10-distauth2.openam.net:8080 retry=300 route=server2
    ProxySet lbmethod=byrequests
    ProxySet stickysession=APLBCOOKIE
</Proxy>
Header add Set-Cookie "APLBCOOKIE=APACHE.%{BALANCER_WORKER_ROUTE}e; path=/;" env=BALANCER_ROUTE_CHANGED
ProxyPass /       balancer://distauth/
ProxyPassReverse / http://sol10-distauth1.openam.net:80/
ProxyPassReverse / http://sol10-distauth2.openam.net:80/
Timeout 300
KeepAlive On
MaxKeepAliveRequests 100
KeepAliveTimeout 1
HostnameLookups Off
~~ ここまで ~~

distauth.warをdistauth1号機、2号機のTomcatのwebapps配下に配備して、Tomcat再起動する。
※ここではdistauth.warをTomcatで動作させることを前提。

次にdistauthのセットアップを行う。 ※1号機、2号機の違いはDistauth Server HostとAncryption Keyのみ。

<例:2号機>

OpenAM管理コンソールの [アクセス制御] - [/(root)レルム] - [一般] タブのDNSエイリアスにdistauth2台と仮想distauth(sol10-lb)のFQDNを登録する。

 
Webブラウザより
http://sol10-lb.openam.net:80/distauth/UI/Login?goto=http://sol10-openam-core.openam.net:8080/openam にアクセスする。 ※gotoパラメタでOpenAM管理コンソールのアドレスを指定。


OpenAM管理コンソールにログインできることを確認する。


次に、OpenAM管理コンソールの [設定] - [サーバーおよびサイト] - [サーバー名(http://sol10-openam-core.openam.net:8080/openam)] - [高度] タブに以下を追加。

プロパティ名:com.sun.identity.authentication.client.ipAddressHeader
プロパティ値:X-Forwarded-For


OpenAM管理コンソールの [設定] - [サーバーおよびサイト] - [デフォルトのサーバー設定値] - [高度] タブで以下を変更。

プロパティ名:openam.retained.http.request.headers
プロパティ値:X-DSAMEVersion ⇒ X-DSAMEVersion,X-Forwarded-For


[高度] タブを編集する場合はTomcat再起動する。
 ※ここではopenam.warをTomcatで動作させることを前提。

次に、distauth1号機、2号機の{Tomcat実行ユーザ}/FAMDistAuth/_usr_local_apache-tomcat-6.0.35_webapps_distauth_AMDistAuthConfig.propertiesファイルを開いて、以下を編集して、Tomcat再起動する。

<1号機>
・変更
#openam.retained.http.request.headers=X-DSAMEVersion
openam.retained.http.request.headers=X-DSAMEVersion,X-Forwarded-For

・追記
com.sun.identity.authentication.client.ipAddressHeader=X-Forwarded-For
com.sun.identity.distauth.cluster=http://sol-distauth1.openam.net:8080/distauth/UI/Login,http://sol-distauth2.openam.net:8080/distauth/UI/Login

<2号機>
・変更
#openam.retained.http.request.headers=X-DSAMEVersion
openam.retained.http.request.headers=X-DSAMEVersion,X-Forwarded-For
・追記
com.sun.identity.authentication.client.ipAddressHeader=X-Forwarded-For
com.sun.identity.distauth.cluster=http://sol-distauth2.openam.net:8080/distauth/UI/Login,http://sol-distauth1.openam.net:8080/distauth/UI/Login


snoopを仕掛ける。
bash-3.00# snoop -o /tmp/out1.txt port 8080 host sol10-distauth1.openam.net
bash-3.00# snoop -o /tmp/out2.txt port 8080 host sol10-distauth2.openam.net

DistAuth経由でdemo/changeitでログイン。


キャプチャを取ると、X-Forwarded-ForにクライアントのIPアドレスが含まれている。

bash-3.00# snoop -i /tmp/out1.txt -x 50 > /tmp/distauth1.txt
bash-3.00# snoop -i /tmp/out2.txt -x 50 > /tmp/distauth2.txt

~~ キャプチャ(ここから) ~~
<例:2号機>
         320           0: 19f5 0000 504f 5354 202f 6469 7374 6175    ....POST /distau
          16: 7468 2f55 492f 4c6f 6769 6e20 4854 5450    th/UI/Login HTTP
          32: 2f31 2e31 0d0a 486f 7374 3a20 736f 6c31    /1.1..Host: sol1
          48: 302d 6c62 2e6f 7065 6e61 6d2e 6e65 740d    0-lb.openam.net.
          64: 0a55 7365 722d 4167 656e 743a 204d 6f7a    .User-Agent: Moz
          80: 696c 6c61 2f35 2e30 2028 5769 6e64 6f77    illa/5.0 (Window
          96: 7320 4e54 2036 2e31 3b20 574f 5736 343b    s NT 6.1; WOW64;
         112: 2072 763a 3237 2e30 2920 4765 636b 6f2f     rv:27.0) Gecko/
         128: 3230 3130 3031 3031 2046 6972 6566 6f78    20100101 Firefox
         144: 2f32 372e 300d 0a41 6363 6570 743a 2074    /27.0..Accept: t
         160: 6578 742f 6874 6d6c 2c61 7070 6c69 6361    ext/html,applica
         176: 7469 6f6e 2f78 6874 6d6c 2b78 6d6c 2c61    tion/xhtml+xml,a
         192: 7070 6c69 6361 7469 6f6e 2f78 6d6c 3b71    pplication/xml;q
         208: 3d30 2e39 2c2a 2f2a 3b71 3d30 2e38 0d0a    =0.9,*/*;q=0.8..
         224: 4163 6365 7074 2d4c 616e 6775 6167 653a    Accept-Language:
         240: 206a 612c 656e 2d75 733b 713d 302e 372c     ja,en-us;q=0.7,
         256: 656e 3b71 3d30 2e33 0d0a 4163 6365 7074    en;q=0.3..Accept
         272: 2d45 6e63 6f64 696e 673a 2067 7a69 702c    -Encoding: gzip,
         288: 2064 6566 6c61 7465 0d0a 5265 6665 7265     deflate..Refere
         304: 723a 2068 7474 703a 2f2f 736f 6c31 302d    r: http://sol10-
         320: 6c62 2e6f 7065 6e61 6d2e 6e65 742f 6469    lb.openam.net/di
         336: 7374 6175 7468 2f55 492f 4c6f 6769 6e3f    stauth/UI/Login?
         352: 676f 746f 3d68 7474 703a 2f2f 736f 6c31    goto=http://sol1
         368: 302d 6f70 656e 616d 2d63 6f72 652e 6f70    0-openam-core.op
         384: 656e 616d 2e6e 6574 3a38 3038 302f 6f70    enam.net:8080/op
         400: 656e 616d 0d0a 436f 6f6b 6965 3a20 4a53    enam..Cookie: JS
         416: 4553 5349 4f4e 4944 3d37 3133 4230 3538    ESSIONID=713B058
         432: 3633 3539 4244 3645 4438 3841 3630 3342    6359BD6ED88A603B
         448: 4342 3335 3838 3937 463b 2061 6d6c 6263    CB358897F; amlbc
         464: 6f6f 6b69 653d 3031 3b20 414d 4469 7374    ookie=01; AMDist
         480: 4175 7468 436f 6f6b 6965 3d22 6874 7470    AuthCookie="http
         496: 3a2f 2f73 6f6c 3130 2d64 6973 7461 7574    ://sol10-distaut
         512: 6832 2e6f 7065 6e61 6d2e 6e65 743a 3830    h2.openam.net:80
         528: 3830 2f64 6973 7461 7574 682f 5549 2f4c    80/distauth/UI/L
         544: 6f67 696e 223b 2044 6973 7441 7574 684c    ogin"; DistAuthL
         560: 4243 6f6f 6b69 654e 616d 653d 4469 7374    BCookieName=Dist
         576: 4175 7468 4c42 436f 6f6b 6965 5661 6c75    AuthLBCookieValu
         592: 653b 2041 504c 4243 4f4f 4b49 453d 4150    e; APLBCOOKIE=AP
         608: 4143 4845 2e73 6572 7665 7232 0d0a 436f    ACHE.server2..Co
         624: 6e74 656e 742d 5479 7065 3a20 6170 706c    ntent-Type: appl
         640: 6963 6174 696f 6e2f 782d 7777 772d 666f    ication/x-www-fo
         656: 726d 2d75 726c 656e 636f 6465 640d 0a58    rm-urlencoded..X
         672: 2d46 6f72 7761 7264 6564 2d46 6f72 3a20    -Forwarded-For:
         688: 3139 322e 3136 382e 3131 2e34 0d0a 582d    192.168.11.4..X-
         704: 466f 7277 6172 6465 642d 486f 7374 3a20    Forwarded-Host:
         720: 736f 6c31 302d 6c62 2e6f 7065 6e61 6d2e    sol10-lb.openam.
         736: 6e65 740d 0a58 2d46 6f72 7761 7264 6564    net..X-Forwarded
         752: 2d53 6572 7665 723a 206c 622e 6f70 656e    -Server: lb.open
         768: 616d 2e6e 6574 0d0a 436f 6e6e 6563 7469    am.net..Connecti
         784: 6f6e 3a20 4b65 6570 2d41 6c69 7665 0d0a    on: Keep-Alive..
         800: 436f 6e74 656e 742d 4c65 6e67 7468 3a20    Content-Length:
         816: 3231 330d 0a0d 0a49 4454 6f6b 656e 313d    213....IDToken1=
         832: 6465 6d6f 2649 4454 6f6b 656e 323d 6368    demo&IDToken2=ch
         848: 616e 6765 6974 2649 4442 7574 746f 6e3d    angeit&IDButton=
         864: 2545 3325 3833 2541 4425 4533 2538 3225    %E3%83%AD%E3%82%
         880: 4230 2545 3325 3832 2541 3425 4533 2538    B0%E3%82%A4%E3%8
         896: 3325 4233 2667 6f74 6f3d 6148 5230 6344    3%B3&goto=aHR0cD
         912: 6f76 4c33 4e76 6244 4577 4c57 3977 5a57    ovL3NvbDEwLW9wZW
         928: 3568 6253 316a 6233 4a6c 4c6d 3977 5a57    5hbS1jb3JlLm9wZW
         944: 3568 6253 3575 5a58 5136 4f44 4134 4d43    5hbS5uZXQ6ODA4MC
         960: 3976 6347 5675 5957 3025 3344 2667 6f74    9vcGVuYW0%3D&got
         976: 6f4f 6e46 6169 6c3d 2653 756e 5175 6572    oOnFail=&SunQuer
         992: 7950 6172 616d 7353 7472 696e 673d 2665    yParamsString=&e
        1008: 6e63 6f64 6564 3d74 7275 6526 6778 5f63    ncoded=true&gx_c
        1024: 6861 7273 6574 3d55 5446 2d38              harset=UTF-8
~~ キャプチャ(ここまで) ~~

OpenAM 11のマニュアルにないが、sunRemoteAuthSecurityEnabledのパラメタが必要。
# ./ssoadm set-attr-defs -u amadmin -f /tmp/pwd.txt -s iPlanetAMAuthService -t Global -a "sunRemoteAuthSecurityEnabled=true"
スキーマのデフォルト属性値が設定されました。

ここで試したところ、DistAuthの定義ファイルの設定値と"sunRemoteAuthSecurityEnabled"の値によって、ログに記録されるIPアドレスに変化があった。

●LBのIPアドレスが出る場合
openam.retained.http.request.headers=X-DSAMEVersion,X-Forwarded-For
#com.sun.identity.authentication.client.ipAddressHeader=X-Forwarded-For
"sunRemoteAuthSecurityEnabled=true"

<例:192.168.11.5はLB>
"2014-11-30 14:45:25"   ログインに成功しました|isNoSession=false        id=demo,ou=user,dc=openam,dc=forgerock,dc=org   5237d414e4b8b7101       192.168.11.5   INFO     dc=openam,dc=forgerock,dc=org   "cn=dsameuser,ou=DSAME Users,dc=openam,dc=forgerock,dc=org"     AUTHENTICATION-100      DataStore       "Not Available"192.168.11.5
"2014-11-30 14:45:27"   ログアウト      id=demo,ou=user,dc=openam,dc=forgerock,dc=org   5237d414e4b8b7101       192.168.11.5    INFO    dc=openam,dc=forgerock,dc=org   "cn=dsameuser,ou=DSAME Users,dc=openam,dc=forgerock,dc=org"     AUTHENTICATION-300      DataStore       "Not Available" 192.168.11.5

●クライアントのIPアドレスが出る場合
openam.retained.http.request.headers=X-DSAMEVersion,X-Forwarded-For
com.sun.identity.authentication.client.ipAddressHeader=X-Forwarded-For
"sunRemoteAuthSecurityEnabled=true"

<例:192.168.11.4はクライアント>
"2014-11-30 14:51:19"   ログインに成功しました|isNoSession=false        id=demo,ou=user,dc=openam,dc=forgerock,dc=org   561402e350fe9ae801      192.168.11.4   INFO     dc=openam,dc=forgerock,dc=org   "cn=dsameuser,ou=DSAME Users,dc=openam,dc=forgerock,dc=org"     AUTHENTICATION-100      DataStore       "Not Available"192.168.11.4
"2014-11-30 14:51:22"   ログアウト      id=demo,ou=user,dc=openam,dc=forgerock,dc=org   561402e350fe9ae801      192.168.11.4    INFO    dc=openam,dc=forgerock,dc=org   "cn=dsameuser,ou=DSAME Users,dc=openam,dc=forgerock,dc=org"     AUTHENTICATION-300      DataStore       "Not Available" 192.168.11.4

●DistAuthのIPアドレスが出る場合
openam.retained.http.request.headers=X-DSAMEVersion,X-Forwarded-For
com.sun.identity.authentication.client.ipAddressHeader=X-Forwarded-For
"sunRemoteAuthSecurityEnabled=false"

<例:192.168.11.15はDistAuth1号機>
"2014-11-30 15:18:25"   ログインに成功しました|isNoSession=false        id=demo,ou=user,dc=openam,dc=forgerock,dc=org   ee680ef4404d6f0301      192.168.11.15  INFO     dc=openam,dc=forgerock,dc=org   "cn=dsameuser,ou=DSAME Users,dc=openam,dc=forgerock,dc=org"     AUTHENTICATION-100      DataStore       "Not Available"192.168.11.15
"2014-11-30 15:18:30"   ログアウト      id=demo,ou=user,dc=openam,dc=forgerock,dc=org   ee680ef4404d6f0301      192.168.11.15   INFO    dc=openam,dc=forgerock,dc=org   "cn=dsameuser,ou=DSAME Users,dc=openam,dc=forgerock,dc=org"     AUTHENTICATION-300      DataStore       "Not Available" 192.168.11.15

結論として、ロードバランサをとおしてクライアントのIPアドレスをログ(audit log)に出すには以下が必要。

・DistAuthの定義ファイルに以下を設定
openam.retained.http.request.headers=X-DSAMEVersion,X-Forwarded-For
com.sun.identity.distauth.cluster=http://sol-distauth1.openam.net:8080/distauth/UI/Login,http://sol-distauth2.openam.net:8080/distauth/UI/Login
com.sun.identity.authentication.client.ipAddressHeader=X-Forwarded-For
・DistAuthの定義とOpenAM管理コンソールの[高度]タブの設定を合わせる
・ssoadmコマンドで"sunRemoteAuthSecurityEnabled=true"を設定
・Tomcat再起動(distAuth、OpenAMとも)


2013年9月6日金曜日

OpenLDAP マルチマスタ(ミラーモード)

Solaris 10(x86)でSun Freewareから取得したバイナリを用いて、OpenLDAP マルチマスタ(ミラーモード)を確認済み。

●1号機/2号機共通
bash-3.00# gunzip db-4.7.25.NC-sol10-x86-local.gz
bash-3.00# gunzip gcc-3.4.6-sol10-x86-local.gz
bash-3.00# gunzip libgcc-3.4.6-sol10-x86-local.gz
bash-3.00# gunzip libtool-2.4.2-sol10-x86-local.gz
bash-3.00# gunzip openldap-2.4.32-sol10-x86-local.gz
bash-3.00# gunzip openssl-1.0.0j-sol10-x86-local.gz
bash-3.00# gunzip sasl-2.1.25-sol10-x86-local.gz
bash-3.00# pkgadd -d ./db-4.7.25.NC-sol10-x86-local
bash-3.00# pkgadd -d ./gcc-3.4.6-sol10-x86-local
bash-3.00# pkgadd -d ./libgcc-3.4.6-sol10-x86-local
bash-3.00# pkgadd -d ./libtool-2.4.2-sol10-x86-local
bash-3.00# pkgadd -d ./openldap-2.4.32-sol10-x86-local
bash-3.00# pkgadd -d ./openssl-1.0.0j-sol10-x86-local
bash-3.00# pkgadd -d ./sasl-2.1.25-sol10-x86-local
bash-3.00# /usr/local/sbin/slappasswd -s secret
{SSHA}POBW3AQbhE4iOFVlGMQlSIlxhz2xypo8
bash-3.00# vi /usr/local/etc/openldap/slapd.conf
----------------------------------------------
●1号機
include         /usr/local/etc/openldap/schema/cosine.schema
include         /usr/local/etc/openldap/schema/nis.schema
# modulepath    /usr/local/libexec/openldap
modulepath      /usr/local/libexec/openldap
moduleload      syncprov.la
#rootpw         secret
rootpw          {SSHA}POBW3AQbhE4iOFVlGMQlSIlxhz2xypo8
overlay syncprov
serverID 1
syncrepl rid=001
  provider=ldap://sol10-openldap1
  bindmethod=simple
  binddn="cn=Manager,dc=my-domain,dc=com"
  credentials=secret
  searchbase="dc=my-domain,dc=com"
  schemachecking=on
  type=refreshAndPersist
  retry="10 +"
syncrepl rid=002
  provider=ldap://sol10-openldap2
  bindmethod=simple
  binddn="cn=Manager,dc=my-domain,dc=com"
  credentials=secret
  searchbase="dc=my-domain,dc=com"
  schemachecking=on
  type=refreshAndPersist
  retry="10 +"
mirrormode on
----------------------------------------------
●2号機
include         /usr/local/etc/openldap/schema/cosine.schema
include         /usr/local/etc/openldap/schema/nis.schema
# modulepath    /usr/local/libexec/openldap
modulepath      /usr/local/libexec/openldap
moduleload      syncprov.la
#rootpw         secret
rootpw          {SSHA}POBW3AQbhE4iOFVlGMQlSIlxhz2xypo8
overlay syncprov
serverID 2
syncrepl rid=001
  provider=ldap://sol10-openldap1
  bindmethod=simple
  binddn="cn=Manager,dc=my-domain,dc=com"
  credentials=secret
  searchbase="dc=my-domain,dc=com"
  schemachecking=on
  type=refreshAndPersist
  retry="10 +"
syncrepl rid=002
  provider=ldap://sol10-openldap2
  bindmethod=simple
  binddn="cn=Manager,dc=my-domain,dc=com"
  credentials=secret
  searchbase="dc=my-domain,dc=com"
  schemachecking=on
  type=refreshAndPersist
  retry="10 +"
mirrormode on
----------------------------------------------
●1号機/2号機共通
bash-3.00# rm -r /usr/local/var/openldap-data
bash-3.00# mkdir /usr/local/var/openldap-data
●1号機
bash-3.00# vi /tmp/init.ldif
dn: dc=my-domain,dc=com
objectClass: dcObject
objectClass: organization
dc: my-domain
o: private Organization
dn: ou=people,dc=my-domain,dc=com
objectclass: organizationalUnit
ou: people
●1号機/2号機共通
bash-3.00# /usr/local/libexec/slapd
bash-3.00# ps -ef|grep slapd
    root  1165     1   0 22:15:40 ?           0:00 /usr/local/libexec/slapd
    root  1167  1007   0 22:15:43 pts/3       0:00 grep slapd
●1号機
bash-3.00# /usr/local/bin/ldapmodify -D "cn=Manager,dc=my-domain,dc=com" -w secret -f /tmp/init.ldif -a
adding new entry "dc=my-domain,dc=com"
adding new entry "ou=people,dc=my-domain,dc=com"
●1号機/2号機共通
bash-3.00# /usr/local/bin/ldapsearch -b "dc=my-domain,dc=com" -D "cn=Manager,dc=my-domain,dc=com" -w secret "objectclass=*" dn
# extended LDIF
#
# LDAPv3
# base <dc=my-domain,dc=com> with scope subtree
# filter: objectclass=*
# requesting: dn
#
# my-domain.com
dn: dc=my-domain,dc=com
# people, my-domain.com
dn: ou=people,dc=my-domain,dc=com
# search result
search: 2
result: 0 Success
# numResponses: 3
# numEntries: 2
●2号機
bash-3.00# vi /tmp/ldapuser.ldif
dn: uid=ldapuser,ou=people,dc=my-domain,dc=com
objectClass: account
objectClass: posixAccount
uid: ldapuser
userPassword: ldapuser
uidNumber: 1000
gidNumber: 1000
cn: ldapuser
homeDirectory: /home/ldapuser
loginShell: /bin/bash
bash-3.00# /usr/local/bin/ldapmodify -D "cn=Manager,dc=my-domain,dc=com" -w secret -f /tmp/ldapuser.ldif -a
adding new entry "uid=ldapuser,ou=people,dc=my-domain,dc=com"
●1号機/2号機共通
bash-3.00# /usr/local/bin/ldapsearch -b "dc=my-domain,dc=com" -D "cn=Manager,dc=my-domain,dc=com" -w secret "objectclass=*" dn
# extended LDIF
#
# LDAPv3
# base <dc=my-domain,dc=com> with scope subtree
# filter: objectclass=*
# requesting: dn
#
# my-domain.com
dn: dc=my-domain,dc=com
# people, my-domain.com
dn: ou=people,dc=my-domain,dc=com
# ldapuser, people, my-domain.com
dn: uid=ldapuser,ou=people,dc=my-domain,dc=com
# search result
search: 2
result: 0 Success
# numResponses: 4
# numEntries: 3

2013年9月3日火曜日

Oracle12c PDB

<準備1.PDB確認>
DBCAを立ち上げて、「プラガブル・データベースの構成」より確認する。


<準備2.PDBオープン>
まずはCDBに接続する。
==================================================================
$ sqlplus /nolog
SQL*Plus: Release 12.1.0.1.0 Production on 火 9月 3 04:04:56 2013
Copyright (c) 1982, 2013, Oracle.  All rights reserved.
SQL> connect /as sysdba
接続されました。
==================================================================

PDBが3つある場合、以下のとおり、3つともに対してREAD WRITE状態に変更する。
==================================================================
SQL> alter session set container=pdb1;
セッションが変更されました。
SQL>  alter pluggable database pdb1 open;
プラガブル・データベースが変更されました。
SQL> select name,open_mode from v$pdbs;
NAME
--------------------------------------------------------------------------------OPEN_MODE
------------------------------
PDB1
READ WRITE
SQL> alter session set container=pdb2;
セッションが変更されました。
SQL>  alter pluggable database pdb2 open;
プラガブル・データベースが変更されました。
SQL> select name,open_mode from v$pdbs;
NAME
--------------------------------------------------------------------------------OPEN_MODE
------------------------------
PDB2
READ WRITE
SQL> alter session set container=pdb3;
セッションが変更されました。
SQL>  alter pluggable database pdb3 open;
プラガブル・データベースが変更されました。
SQL> select name,open_mode from v$pdbs;
NAME
--------------------------------------------------------------------------------OPEN_MODE
------------------------------
PDB3
READ WRITE
==================================================================

<アーキテクチャの確認>
次に、CDBで各種ファイルを確認する。
==================================================================
$ sqlplus /nolog
SQL*Plus: Release 12.1.0.1.0 Production on 火 9月 3 03:41:33 2013
Copyright (c) 1982, 2013, Oracle.  All rights reserved.
SQL> connect /as sysdba
接続されました。
SQL> select member from v$logfile;
MEMBER
--------------------------------------------------------------------------------/oracle/product/12.0.1/oradata/orcl/redo03.log
/oracle/product/12.0.1/oradata/orcl/redo02.log
/oracle/product/12.0.1/oradata/orcl/redo01.log
SQL> select name from v$archived_log;
NAME
--------------------------------------------------------------------------------/oracle/product/12.0.1/fast_recovery_area/ORCL/archivelog/2013_09_01/o1_mf_1_12_924y657l_.arc
/oracle/product/12.0.1/fast_recovery_area/ORCL/archivelog/2013_09_01/o1_mf_1_13_924y7cbt_.arc
/oracle/product/12.0.1/fast_recovery_area/ORCL/archivelog/2013_09_01/o1_mf_1_14_924y8882_.arc
/oracle/product/12.0.1/fast_recovery_area/ORCL/archivelog/2013_09_01/o1_mf_1_15_9250wpq1_.arc
NAME
--------------------------------------------------------------------------------
/oracle/product/12.0.1/fast_recovery_area/ORCL/archivelog/2013_09_01/o1_mf_1_16_9254bbvm_.arc
/oracle/product/12.0.1/fast_recovery_area/ORCL/archivelog/2013_09_01/o1_mf_1_17_925x1srm_.arc
/oracle/product/12.0.1/fast_recovery_area/ORCL/archivelog/2013_09_02/o1_mf_1_18_9293r1l4_.arc
/oracle/product/12.0.1/fast_recovery_area/ORCL/archivelog/2013_09_02/o1_mf_1_19_
NAME
--------------------------------------------------------------------------------9293xllx_.arc
/oracle/product/12.0.1/fast_recovery_area/ORCL/archivelog/2013_09_02/o1_mf_1_20_9293zorg_.arc
/oracle/product/12.0.1/fast_recovery_area/ORCL/archivelog/2013_09_02/o1_mf_1_21_92942517_.arc

10行が選択されました。
SQL> select name from v$datafile;
NAME
--------------------------------------------------------------------------------/oracle/product/12.0.1/oradata/orcl/system01.dbf
/oracle/product/12.0.1/oradata/orcl/sysaux01.dbf
/oracle/product/12.0.1/oradata/orcl/undotbs01.dbf
/oracle/product/12.0.1/oradata/orcl/pdbseed/system01.dbf
/oracle/product/12.0.1/oradata/orcl/users01.dbf
/oracle/product/12.0.1/oradata/orcl/pdbseed/sysaux01.dbf
/oracle/product/12.0.1/oradata/orcl/pdb1/system01.dbf
/oracle/product/12.0.1/oradata/orcl/pdb1/sysaux01.dbf
/oracle/product/12.0.1/oradata/orcl/pdb1/pdb1_users01.dbf
/oracle/product/12.0.1/oradata/orcl/pdb2/system01.dbf
/oracle/product/12.0.1/oradata/orcl/pdb2/sysaux01.dbf
NAME
--------------------------------------------------------------------------------/oracle/product/12.0.1/oradata/orcl/pdb2/pdb2_users01.dbf
/oracle/product/12.0.1/oradata/orcl/pdb3/system01.dbf
/oracle/product/12.0.1/oradata/orcl/pdb3/sysaux01.dbf
/oracle/product/12.0.1/oradata/orcl/pdb3/pdb3_users01.dbf
15行が選択されました。
SQL> col component format a20
SQL> select component, current_size curr_size, min_size, max_size,user_specified_size uss, granule_size gs from v$memory_dynamic_components where current_size > 0;
COMPONENT             CURR_SIZE   MIN_SIZE   MAX_SIZE        USS         GS
-------------------- ---------- ---------- ---------- ---------- ----------
shared pool           419430400  419430400  419430400          0   16777216
large pool             33554432   33554432  150994944          0   16777216
java pool              16777216   16777216   16777216          0   16777216
SGA Target           2030043136 2030043136 2030043136          0   16777216
DEFAULT buffer cache 1526726656 1409286144 1526726656          0   16777216
PGA Target           1375731712 1375731712 1375731712          0   16777216
6行が選択されました。
==================================================================


次に、PDBで各種ファイルを確認する。
==================================================================
$ more tnsnames.ora
# tnsnames.ora Network Configuration File: /oracle/product/12.0.1/OraHome1/network/admin/tnsnames.ora
# Generated by Oracle configuration tools.
LISTENER_ORCL =
  (ADDRESS = (PROTOCOL = TCP)(HOST = sol10-oracle3)(PORT = 1521))

ORCL =
  (DESCRIPTION =
    (ADDRESS = (PROTOCOL = TCP)(HOST = sol10-oracle3)(PORT = 1521))
    (CONNECT_DATA =
      (SERVER = DEDICATED)
      (SERVICE_NAME = orcl)
    )
  )
SRV_PDB1=
 (DESCRIPTION =
  (ADDRESS = (PROTOCOL = TCP )(HOST = sol10-oracle3)(PORT = 1521))
    (CONNECT_DATA =
    (SERVER = DEDICATED)
  (SERVICE_NAME = pdb1)
 )
)
~ 省略 ~
% sqlplus system/sol10-oracle3@SRV_PDB1
SQL*Plus: Release 12.1.0.1.0 Production on 月 9月 2 22:22:14 2013
Copyright (c) 1982, 2013, Oracle.  All rights reserved.

Oracle Database 12c Enterprise Edition Release 12.1.0.1.0 - 64bit Production
With the Partitioning, OLAP, Advanced Analytics and Real Application Testing options
に接続されました。
SQL> alter session set container=pdb1;
セッションが変更されました。
SQL> startup
プラガブル・データベースがオープンされました。SQL>
SQL> select member from v$logfile;
MEMBER
--------------------------------------------------------------------------------/oracle/product/12.0.1/oradata/orcl/redo03.log
/oracle/product/12.0.1/oradata/orcl/redo02.log
/oracle/product/12.0.1/oradata/orcl/redo01.log
SQL> select name from v$archived_log;
NAME
--------------------------------------------------------------------------------/oracle/product/12.0.1/fast_recovery_area/ORCL/archivelog/2013_09_01/o1_mf_1_12_924y657l_.arc
/oracle/product/12.0.1/fast_recovery_area/ORCL/archivelog/2013_09_01/o1_mf_1_13_924y7cbt_.arc
/oracle/product/12.0.1/fast_recovery_area/ORCL/archivelog/2013_09_01/o1_mf_1_14_924y8882_.arc
/oracle/product/12.0.1/fast_recovery_area/ORCL/archivelog/2013_09_01/o1_mf_1_15_9250wpq1_.arc
NAME
--------------------------------------------------------------------------------
/oracle/product/12.0.1/fast_recovery_area/ORCL/archivelog/2013_09_01/o1_mf_1_16_9254bbvm_.arc
/oracle/product/12.0.1/fast_recovery_area/ORCL/archivelog/2013_09_01/o1_mf_1_17_925x1srm_.arc
/oracle/product/12.0.1/fast_recovery_area/ORCL/archivelog/2013_09_02/o1_mf_1_18_9293r1l4_.arc
/oracle/product/12.0.1/fast_recovery_area/ORCL/archivelog/2013_09_02/o1_mf_1_19_
NAME
--------------------------------------------------------------------------------9293xllx_.arc
/oracle/product/12.0.1/fast_recovery_area/ORCL/archivelog/2013_09_02/o1_mf_1_20_9293zorg_.arc
/oracle/product/12.0.1/fast_recovery_area/ORCL/archivelog/2013_09_02/o1_mf_1_21_92942517_.arc

10行が選択されました。
SQL> select name from v$datafile;
NAME
--------------------------------------------------------------------------------/oracle/product/12.0.1/oradata/orcl/undotbs01.dbf
/oracle/product/12.0.1/oradata/orcl/pdb3/system01.dbf
/oracle/product/12.0.1/oradata/orcl/pdb3/sysaux01.dbf
/oracle/product/12.0.1/oradata/orcl/pdb3/pdb3_users01.dbf
SQL> col component format a20
SQL> select component, current_size curr_size, min_size, max_size,user_specified_size uss, granule_size gs from v$memory_dynamic_components where current_size > 0;
COMPONENT             CURR_SIZE   MIN_SIZE   MAX_SIZE        USS         GS
-------------------- ---------- ---------- ---------- ---------- ----------
shared pool           419430400  419430400  419430400          0   16777216
large pool             33554432   33554432  150994944          0   16777216
java pool              16777216   16777216   16777216          0   16777216
SGA Target           2030043136 2030043136 2030043136          0   16777216
DEFAULT buffer cache 1426063360 1409286144 1526726656          0   16777216
Shared IO Pool        100663296          0  100663296          0   16777216
PGA Target           1375731712 1375731712 1375731712          0   16777216
6行が選択されました。
==================================================================

<まとめ>
・REDOログ、アーカイブログ、SGA/PGAはCDBとPDBで共用。
・データファイルはCDBとPDBで別。CDB接続時はPDB側の情報が閲覧可能だが、PDB接続時は当該PDBのみの情報のみ閲覧可能。

Solaris 10 ZFS

bash-3.2# zpool create rpool c2t0d0 c2t1d0
bash-3.2# zfs list
NAME    USED  AVAIL  REFER  MOUNTPOINT
rpool    79K  31.3G    31K  /rpool
bash-3.2# zfs create rpool/storage1
bash-3.2# zfs create rpool/storage2
bash-3.2# zfs create rpool/storage3
bash-3.2# df -k
ファイルシステム      kbytes 使用済み 使用可能 容量      マウント先
/dev/dsk/c0d0s0      21177107 11497054 9468282    55%    /
/devices                   0       0       0     0%    /devices
ctfs                       0       0       0     0%    /system/contract
proc                       0       0       0     0%    /proc
mnttab                     0       0       0     0%    /etc/mnttab
swap                 16170508     996 16169512     1%    /etc/svc/volatile
objfs                      0       0       0     0%    /system/object
sharefs                    0       0       0     0%    /etc/dfs/sharetab
/usr/lib/libc/libc_hwcap1.so.1
                     21177107 11497054 9468282    55%    /lib/libc.so.1
fd                         0       0       0     0%    /dev/fd
swap                 16169624     112 16169512     1%    /tmp
swap                 16169552      40 16169512     1%    /var/run
/dev/dsk/c0d1s7      20599663 12393044 8000623    61%    /oracle
/hgfs                16777215    4096 16772864     1%    /hgfs
/tmp/VMwareDnD             0       0       0     0%    /var/run/vmblock
/dev/lofi/1          2201236 2201236       0   100%    /mnt
rpool                32772096      33 32771883     1%    /rpool
rpool/storage1       32772096      31 32771883     1%    /rpool/storage1
rpool/storage2       32772096      31 32771883     1%    /rpool/storage2
rpool/storage3       32772096      31 32771883     1%    /rpool/storage3
bash-3.2# zonecfg -z testZone1
testZone1: そのような構成済みゾーンはありません
'create' を使用して、新しいゾーンの構成を開始してください。
zonecfg:testZone1> create
zonecfg:testZone1> set zonepath=/rpool/storage1
zonecfg:testZone1> add net
zonecfg:testZone1:net> set physical=e1000g0
zonecfg:testZone1:net> set address=172.168.20.13
zonecfg:testZone1:net> end
zonecfg:testZone1> set autoboot=true
zonecfg:testZone1> info
zonename: testZone1
zonepath: /rpool/storage1
brand: native
autoboot: true
bootargs:
pool:
limitpriv:
scheduling-class:
ip-type: shared
hostid:
inherit-pkg-dir:
        dir: /lib
inherit-pkg-dir:
        dir: /platform
inherit-pkg-dir:
        dir: /sbin
inherit-pkg-dir:
        dir: /usr
net:
        address: 172.168.20.13
        physical: e1000g0
        defrouter が指定されていません
zonecfg:testZone1> export
create -b
set zonepath=/rpool/storage1
set autoboot=true
set ip-type=shared
add inherit-pkg-dir
set dir=/lib
end
add inherit-pkg-dir
set dir=/platform
end
add inherit-pkg-dir
set dir=/sbin
end
add inherit-pkg-dir
set dir=/usr
end
add net
set address=172.168.20.13
set physical=e1000g0
end
zonecfg:testZone1> verify
zonecfg:testZone1> exit
bash-3.2# zoneadm list -vc
  ID NAME             STATUS     PATH                           BRAND    IP
   0 global           running    /                              native   shared
   - testZone1         configured /rpool/storage1                native   shared
bash-3.2# chmod 700 storage1
bash-3.2# zoneadm -z testZone1 install
ZFS データセット rpool/storage1 を作成できません: dataset already exists
Preparing to install zone <testZone1>.
Creating list of files to copy from the global zone.
Copying <2908> files to the zone.
Initializing zone product registry.
Determining zone package initialization order.
Preparing to initialize <1225> packages on the zone.
Initialized <1225> packages on zone.
Zone <testZone1> is initialized.
ファイル </rpool/storage1/root/var/sadm/system/logs/install_log> には、ゾーンの インストールのログが含まれています。
bash-3.2# zoneadm -z testZone1 boot
bash-3.2# zlogin -C testZone1
[ゾーン 'testZone1' コンソールに接続しました]
Select a Language
  0. English
  1. Japanese
Please make a choice (0 - 1), or press h or ? for help:1
Select a Locale
  0. Japanese EUC (ja)
  1. Japanese EUC (ja_JP.eucJP)
  2. Japanese PC Kanji (ja_JP.PCK)
  3. Japanese UTF-8 (ja_JP.UTF-8)
  4. Go Back to Previous Screen
Please make a choice (0 - 4), or press h or ? for help: 0
どのタイプの端末を使用していますか?
 1) ANSI 標準 CRT
 2) DEC VT52
 3) DEC VT100
 4) Heathkit 19
 5) Lear Siegler ADM31
 6) PC コンソール
 7) Sun コマンドツール
 8) Sun ワークステーション
 9) Televideo 910
 10) Televideo 925
 11) Wyse Model 50
 12) X 端末エミュレータ (xterms)
 13) CDE 端末エミュレータ (dtterm)
 14) その他
選択する番号を入力して、Return キーを押してください。12
Creating new rsa public/private host key pair
Creating new dsa public/private host key pair
Configuring network interface addresses: e1000g0.
─ Host Name for e1000g0:1 ──────────────────────────────────────────────────────
  Enter the host name which identifies this system on the network.  The name
  must be unique within your domain; creating a duplicate host name will cause
  problems on the network after you install Solaris.
  A host name must have at least one character; it can contain letters,
  digits, and minus signs (-).

             Host name for e1000g0:1 sol10-oracle3-1

  > Press F2 to go to the next screen.


────────────────────────────────────────────────────────────────────────────────    F2_Continue    F6_Help


─ Confirm Information for e1000g0:1 ────────────────────────────────────────────
  > Confirm the following information.  If it is correct, press F2;
    to change any information, press F4.

                          Host name: sol10-oracle3-1


────────────────────────────────────────────────────────────────────────────────    Esc-2_Continue    Esc-4_Change    Esc-6_Help


─ Configure Security Policy: ───────────────────────────────────────────────────
  Specify Yes if the system will use the Kerberos security mechanism.
  Specify No if this system will use standard UNIX security.
      Configure Kerberos Security
      ───────────────────────────
      [ ] Yes
      [X] No


────────────────────────────────────────────────────────────────────────────────    Esc-2_Continue    Esc-6_Help


─ Confirm Information ──────────────────────────────────────────────────────────
  > Confirm the following information.  If it is correct, press F2;
    to change any information, press F4.

        Configure Kerberos Security: No


────────────────────────────────────────────────────────────────────────────────    Esc-2_Continue    Esc-4_Change    Esc-6_Help


─ Name Service ─────────────────────────────────────────────────────────────────
  On this screen you must provide name service information.  Select the name
  service that will be used by this system, or None if your system will either
  not use a name service at all, or if it will use a name service not listed
  here.
  > To make a selection, use the arrow keys to highlight the option
    and press Return to mark it [X].

      Name service
      ────────────
      [ ] NIS+
      [ ] NIS
      [ ] DNS
      [ ] LDAP
      [X] None


────────────────────────────────────────────────────────────────────────────────    Esc-2_Continue    Esc-6_Help


─ Confirm Information ──────────────────────────────────────────────────────────
  > Confirm the following information.  If it is correct, press F2;
    to change any information, press F4.

                       Name service: None


────────────────────────────────────────────────────────────────────────────────    Esc-2_Continue    Esc-4_Change    Esc-6_Help


─ NFSv4 Domain Name ────────────────────────────────────────────────────────────
  NFS version 4 uses a domain name that is automatically derived from the
  system's naming services. The derived domain name is sufficient for most
  configurations. In a few cases, mounts that cross domain boundaries might
  cause files to appear to be owned by "nobody" due to the lack of a common
  domain name.
  The current NFSv4 default domain is: ""

      NFSv4 Domain Configuration
      ──────────────────────────────────────────────
      [X] Use the NFSv4 domain derived by the system
      [ ] Specify a different NFSv4 domain


────────────────────────────────────────────────────────────────────────────────    Esc-2_Continue    Esc-6_Help


─ Confirm Information for NFSv4 Domain ─────────────────────────────────────────
  > Confirm the following information.  If it is correct, press F2;
    to change any information, press F4.

                 NFSv4 Domain Name:  << Value to be derived dynamically >>


────────────────────────────────────────────────────────────────────────────────    Esc-2_Continue    Esc-4_Change    Esc-6_Help


─ Time Zone ────────────────────────────────────────────────────────────────────
  On this screen you must specify your default time zone.  You can specify a
  time zone in three ways:  select one of the continents or oceans from the
  list, select other - offset from GMT, or other - specify time zone file.
  > To make a selection, use the arrow keys to highlight the option and
    press Return to mark it [X].

      Continents and Oceans
      ──────────────────────────────────
  -   [ ] Africa
  │   [ ] Americas
  │   [ ] Antarctica
  │   [ ] Arctic Ocean
  │   [X] Asia
  │   [ ] Atlantic Ocean
  │   [ ] Australia
  │   [ ] Europe
  v   [ ] Indian Ocean
────────────────────────────────────────────────────────────────────────────────    Esc-2_Continue    Esc-6_Help


─ Country or Region ────────────────────────────────────────────────────────────
  > To make a selection, use the arrow keys to highlight the option and
    press Return to mark it [X].

      Countries and Regions
      ────────────────────────
  ^   [ ] Georgia
  │   [ ] Hong Kong
  │   [ ] India
  │   [ ] Indonesia
  │   [ ] Iran
  │   [ ] Iraq
  │   [ ] Israel
  │   [X] Japan
  │   [ ] Jordan
  │   [ ] Kazakhstan
  │   [ ] Korea (North)
  │   [ ] Korea (South)
  v   [ ] Kuwait
────────────────────────────────────────────────────────────────────────────────    Esc-2_Continue    Esc-6_Help


─ Confirm Information ──────────────────────────────────────────────────────────
  > Confirm the following information.  If it is correct, press F2;
    to change any information, press F4.

                          Time zone: Japan


────────────────────────────────────────────────────────────────────────────────    Esc-2_Continue    Esc-4_Change    Esc-6_Help


─ Root Password ────────────────────────────────────────────────────────────────
  Please enter the root password for this system.
  The root password may contain alphanumeric and special characters.  For
  security, the password will not be displayed on the screen as you type it.
  > If you do not want a root password, leave both entries blank.

                     Root password:  ***************
                     Root password:  ***************


────────────────────────────────────────────────────────────────────────────────    Esc-2_Continue    Esc-6_Help


rebooting system due to change(s) in /etc/default/init

[注意: ゾーンをリブートしています]

SunOS Release 5.10 Version Generic_147441-01 64-bit
Copyright (c) 1983, 2011, Oracle and/or its affiliates. All rights reserved.
Hostname: sol10-oracle3-1
sol10-oracle3-1 console login:

2013年9月1日日曜日

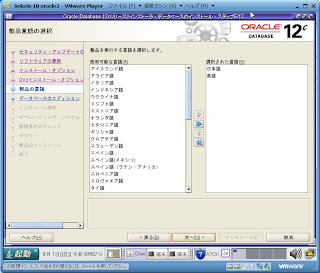
Oracle12cのインストール

<準備その1>
VMwarePlayerで以下のOSをインストールする。
・パーティション
ハードディスク1つ目
/ は20GB
swapは10GB
ハードディスク2つ目
/oracleは20GB
・メモリは8GB

<準備その2>
インストール前に以下の作業を行う。
# vi /etc/system
set noexec_user_stack = 1
set semsys:seminfo_semmns = 1024
set semsys:seminfo_semvmx = 32767
# projadd -K "project.max-shm-memory=(privileged,4294967296,deny)" user.oracle
 
★4294967295ではなく、4294967296
# projmod -a -K "project.max-sem-ids=(privileged,100,deny)" user.oracle
# projmod -a -K "process.max-sem-nsems=(privileged,256,deny)" user.oracle
# projmod -a -K "project.max-shm-ids=(privileged,100,deny)" user.oracle
# shutdown -y -i6 -g0

★SUNWeu8osというUTF-8関連のパッケージがなければ、インストールしておく。

<準備その3>
・oinstallグループおよびdbaグループを作成する。
# /usr/sbin/groupadd oinstall
# /usr/sbin/groupadd dba
・oracleユーザーを作成する。
すでにoracleユーザーが存在するかを確認する。
# id oracle
出力例:uid=100(oracle) gid=100(oinstall) groups=101(dba)
oracleユーザーが存在しなければ次のコマンドで作成する。
# /usr/sbin/useradd -g oinstall -G dba oracle
すでにoracleユーザーが存在していて、プライマリグループがoinstallではないか、dbaグループのメンバーでない場合は、以下のコマンドで必要なグループを指定する。
# /usr/sbin/usermod -g oinstall -G dba oracle
・oracleユーザーのパスワードを設定する。
# passwd oracle
・oracleユーザーのホームディレクトリを作成する。
# mkdir -p /export/home/oracle
# chown oracle:oinstall /export/home/oracle

solaris.x64_12cR1_database_1of2.zipとsolaris.x64_12cR1_database_2of2.zipをOracle社のサイトからダウンロードし、Oracleユーザで両ファイルとも解凍する。次にOracleユーザでコンソールにログインする。

・x86版のサーバ製品インストール
% ./runInstaller


・root.shの実行 ※oracleInventoryがない場合、orainstRoot.shの実行もある。
# /oracle/product/12.0.1/OraHome1/root.sh
Performing root user operation for Oracle 12c
The following environment variables are set as:
    ORACLE_OWNER= oracle
    ORACLE_HOME=  /oracle/product/12.0.1/OraHome1
Enter the full pathname of the local bin directory: [/usr/local/bin]:
The contents of "dbhome" have not changed. No need to overwrite.
The file "oraenv" already exists in /usr/local/bin.  Overwrite it? (y/n) [n]: y
   Copying oraenv to /usr/local/bin ...
The file "coraenv" already exists in /usr/local/bin.  Overwrite it? (y/n) [n]: y   Copying coraenv to /usr/local/bin ...
Entries will be added to the /var/opt/oracle/oratab file as needed by
Database Configuration Assistant when a database is created
Finished running generic part of root script.
Now product-specific root actions will be performed.
 
 
・Net Configuration Assistant % $ORACLE_HOME/bin/netca


・Database Configuration Assistant % $ORACLE_HOME/bin/dbca


・Enterprise Manager Express
% sqlplus /nolog
SQL*Plus: Release 12.1.0.1.0 Production on 日 9月 1 11:31:19 2013
Copyright (c) 1982, 2013, Oracle.  All rights reserved.
SQL> connect /as sysdba
接続されました。
SQL> exec DBMS_XDB_CONFIG.SETHTTPSPORT(5500);
PL/SQLプロシージャが正常に完了しました。
SQL> quit
Oracle Database 12c Enterprise Edition Release 12.1.0.1.0 - 64bit Production
With the Partitioning, OLAP, Advanced Analytics and Real Application Testing optionsとの接続が切断されました。
% netstat -a|grep 5500
      *.5500               *.*                0      0 49152      0 LISTEN
      *.5500                            *.*                             0      0 49152      0 LISTEN
 ★5500/tcpが起動していることを確認する。

Webブラウザでhttps://FQDNまたはIPアドレス:5500/emへアクセスする。