Solaris 10(x86)でSun Freewareから取得したバイナリを用いて、OpenLDAP マルチマスタ(ミラーモード)を確認済み。
●1号機/2号機共通
bash-3.00# gunzip db-4.7.25.NC-sol10-x86-local.gz
bash-3.00# gunzip gcc-3.4.6-sol10-x86-local.gz
bash-3.00# gunzip libgcc-3.4.6-sol10-x86-local.gz
bash-3.00# gunzip libtool-2.4.2-sol10-x86-local.gz
bash-3.00# gunzip openldap-2.4.32-sol10-x86-local.gz
bash-3.00# gunzip openssl-1.0.0j-sol10-x86-local.gz
bash-3.00# gunzip sasl-2.1.25-sol10-x86-local.gz
bash-3.00# pkgadd -d ./db-4.7.25.NC-sol10-x86-local
bash-3.00# pkgadd -d ./gcc-3.4.6-sol10-x86-local
bash-3.00# pkgadd -d ./libgcc-3.4.6-sol10-x86-local
bash-3.00# pkgadd -d ./libtool-2.4.2-sol10-x86-local
bash-3.00# pkgadd -d ./openldap-2.4.32-sol10-x86-local
bash-3.00# pkgadd -d ./openssl-1.0.0j-sol10-x86-local
bash-3.00# pkgadd -d ./sasl-2.1.25-sol10-x86-local
bash-3.00# /usr/local/sbin/slappasswd -s secret
{SSHA}POBW3AQbhE4iOFVlGMQlSIlxhz2xypo8
bash-3.00# vi /usr/local/etc/openldap/slapd.conf
----------------------------------------------
●1号機
include /usr/local/etc/openldap/schema/cosine.schema
include /usr/local/etc/openldap/schema/nis.schema
# modulepath /usr/local/libexec/openldap
modulepath /usr/local/libexec/openldap
moduleload syncprov.la
#rootpw secret
rootpw {SSHA}POBW3AQbhE4iOFVlGMQlSIlxhz2xypo8
overlay syncprov
serverID 1
syncrepl rid=001
provider=ldap://sol10-openldap1
bindmethod=simple
binddn="cn=Manager,dc=my-domain,dc=com"
credentials=secret
searchbase="dc=my-domain,dc=com"
schemachecking=on
type=refreshAndPersist
retry="10 +"
syncrepl rid=002
provider=ldap://sol10-openldap2
bindmethod=simple
binddn="cn=Manager,dc=my-domain,dc=com"
credentials=secret
searchbase="dc=my-domain,dc=com"
schemachecking=on
type=refreshAndPersist
retry="10 +"
mirrormode on
----------------------------------------------
●2号機
include /usr/local/etc/openldap/schema/cosine.schema
include /usr/local/etc/openldap/schema/nis.schema
# modulepath /usr/local/libexec/openldap
modulepath /usr/local/libexec/openldap
moduleload syncprov.la
#rootpw secret
rootpw {SSHA}POBW3AQbhE4iOFVlGMQlSIlxhz2xypo8
overlay syncprov
serverID 2
syncrepl rid=001
provider=ldap://sol10-openldap1
bindmethod=simple
binddn="cn=Manager,dc=my-domain,dc=com"
credentials=secret
searchbase="dc=my-domain,dc=com"
schemachecking=on
type=refreshAndPersist
retry="10 +"
syncrepl rid=002
provider=ldap://sol10-openldap2
bindmethod=simple
binddn="cn=Manager,dc=my-domain,dc=com"
credentials=secret
searchbase="dc=my-domain,dc=com"
schemachecking=on
type=refreshAndPersist
retry="10 +"
mirrormode on
----------------------------------------------
●1号機/2号機共通
bash-3.00# rm -r /usr/local/var/openldap-data
bash-3.00# mkdir /usr/local/var/openldap-data
●1号機
bash-3.00# vi /tmp/init.ldif
dn: dc=my-domain,dc=com
objectClass: dcObject
objectClass: organization
dc: my-domain
o: private Organization
dn: ou=people,dc=my-domain,dc=com
objectclass: organizationalUnit
ou: people
●1号機/2号機共通
bash-3.00# /usr/local/libexec/slapd
bash-3.00# ps -ef|grep slapd
root 1165 1 0 22:15:40 ? 0:00 /usr/local/libexec/slapd
root 1167 1007 0 22:15:43 pts/3 0:00 grep slapd
●1号機
bash-3.00# /usr/local/bin/ldapmodify -D "cn=Manager,dc=my-domain,dc=com" -w secret -f /tmp/init.ldif -a
adding new entry "dc=my-domain,dc=com"
adding new entry "ou=people,dc=my-domain,dc=com"
●1号機/2号機共通
bash-3.00# /usr/local/bin/ldapsearch -b "dc=my-domain,dc=com" -D "cn=Manager,dc=my-domain,dc=com" -w secret "objectclass=*" dn
# extended LDIF
#
# LDAPv3
# base <dc=my-domain,dc=com> with scope subtree
# filter: objectclass=*
# requesting: dn
#
# my-domain.com
dn: dc=my-domain,dc=com
# people, my-domain.com
dn: ou=people,dc=my-domain,dc=com
# search result
search: 2
result: 0 Success
# numResponses: 3
# numEntries: 2
●2号機
bash-3.00# vi /tmp/ldapuser.ldif
dn: uid=ldapuser,ou=people,dc=my-domain,dc=com
objectClass: account
objectClass: posixAccount
uid: ldapuser
userPassword: ldapuser
uidNumber: 1000
gidNumber: 1000
cn: ldapuser
homeDirectory: /home/ldapuser
loginShell: /bin/bash
bash-3.00# /usr/local/bin/ldapmodify -D "cn=Manager,dc=my-domain,dc=com" -w secret -f /tmp/ldapuser.ldif -a
adding new entry "uid=ldapuser,ou=people,dc=my-domain,dc=com"
●1号機/2号機共通
bash-3.00# /usr/local/bin/ldapsearch -b "dc=my-domain,dc=com" -D "cn=Manager,dc=my-domain,dc=com" -w secret "objectclass=*" dn
# extended LDIF
#
# LDAPv3
# base <dc=my-domain,dc=com> with scope subtree
# filter: objectclass=*
# requesting: dn
#
# my-domain.com
dn: dc=my-domain,dc=com
# people, my-domain.com
dn: ou=people,dc=my-domain,dc=com
# ldapuser, people, my-domain.com
dn: uid=ldapuser,ou=people,dc=my-domain,dc=com
# search result
search: 2
result: 0 Success
# numResponses: 4
# numEntries: 3
2013年9月6日金曜日
2013年9月3日火曜日
Oracle12c PDB
<準備1.PDB確認>
DBCAを立ち上げて、「プラガブル・データベースの構成」より確認する。


<準備2.PDBオープン>
まずはCDBに接続する。
==================================================================
$ sqlplus /nolog
SQL*Plus: Release 12.1.0.1.0 Production on 火 9月 3 04:04:56 2013
Copyright (c) 1982, 2013, Oracle. All rights reserved.
SQL> connect /as sysdba
接続されました。
==================================================================
PDBが3つある場合、以下のとおり、3つともに対してREAD WRITE状態に変更する。
==================================================================
SQL> alter session set container=pdb1;
セッションが変更されました。
SQL> alter pluggable database pdb1 open;
プラガブル・データベースが変更されました。
SQL> select name,open_mode from v$pdbs;
NAME
--------------------------------------------------------------------------------OPEN_MODE
------------------------------
PDB1
READ WRITE
SQL> alter session set container=pdb2;
セッションが変更されました。
SQL> alter pluggable database pdb2 open;
プラガブル・データベースが変更されました。
SQL> select name,open_mode from v$pdbs;
NAME
--------------------------------------------------------------------------------OPEN_MODE
------------------------------
PDB2
READ WRITE
SQL> alter session set container=pdb3;
セッションが変更されました。
SQL> alter pluggable database pdb3 open;
プラガブル・データベースが変更されました。
SQL> select name,open_mode from v$pdbs;
NAME
--------------------------------------------------------------------------------OPEN_MODE
------------------------------
PDB3
READ WRITE
==================================================================
<アーキテクチャの確認>
次に、CDBで各種ファイルを確認する。
==================================================================
$ sqlplus /nolog
SQL*Plus: Release 12.1.0.1.0 Production on 火 9月 3 03:41:33 2013
Copyright (c) 1982, 2013, Oracle. All rights reserved.
SQL> connect /as sysdba
接続されました。
SQL> select member from v$logfile;
MEMBER
--------------------------------------------------------------------------------/oracle/product/12.0.1/oradata/orcl/redo03.log
/oracle/product/12.0.1/oradata/orcl/redo02.log
/oracle/product/12.0.1/oradata/orcl/redo01.log
SQL> select name from v$archived_log;
NAME
--------------------------------------------------------------------------------/oracle/product/12.0.1/fast_recovery_area/ORCL/archivelog/2013_09_01/o1_mf_1_12_924y657l_.arc
/oracle/product/12.0.1/fast_recovery_area/ORCL/archivelog/2013_09_01/o1_mf_1_13_924y7cbt_.arc
/oracle/product/12.0.1/fast_recovery_area/ORCL/archivelog/2013_09_01/o1_mf_1_14_924y8882_.arc
/oracle/product/12.0.1/fast_recovery_area/ORCL/archivelog/2013_09_01/o1_mf_1_15_9250wpq1_.arc
NAME
--------------------------------------------------------------------------------
/oracle/product/12.0.1/fast_recovery_area/ORCL/archivelog/2013_09_01/o1_mf_1_16_9254bbvm_.arc
/oracle/product/12.0.1/fast_recovery_area/ORCL/archivelog/2013_09_01/o1_mf_1_17_925x1srm_.arc
/oracle/product/12.0.1/fast_recovery_area/ORCL/archivelog/2013_09_02/o1_mf_1_18_9293r1l4_.arc
/oracle/product/12.0.1/fast_recovery_area/ORCL/archivelog/2013_09_02/o1_mf_1_19_
NAME
--------------------------------------------------------------------------------9293xllx_.arc
/oracle/product/12.0.1/fast_recovery_area/ORCL/archivelog/2013_09_02/o1_mf_1_20_9293zorg_.arc
/oracle/product/12.0.1/fast_recovery_area/ORCL/archivelog/2013_09_02/o1_mf_1_21_92942517_.arc
10行が選択されました。
SQL> select name from v$datafile;
NAME
--------------------------------------------------------------------------------/oracle/product/12.0.1/oradata/orcl/system01.dbf
/oracle/product/12.0.1/oradata/orcl/sysaux01.dbf
/oracle/product/12.0.1/oradata/orcl/undotbs01.dbf
/oracle/product/12.0.1/oradata/orcl/pdbseed/system01.dbf
/oracle/product/12.0.1/oradata/orcl/users01.dbf
/oracle/product/12.0.1/oradata/orcl/pdbseed/sysaux01.dbf
/oracle/product/12.0.1/oradata/orcl/pdb1/system01.dbf
/oracle/product/12.0.1/oradata/orcl/pdb1/sysaux01.dbf
/oracle/product/12.0.1/oradata/orcl/pdb1/pdb1_users01.dbf
/oracle/product/12.0.1/oradata/orcl/pdb2/system01.dbf
/oracle/product/12.0.1/oradata/orcl/pdb2/sysaux01.dbf
NAME
--------------------------------------------------------------------------------/oracle/product/12.0.1/oradata/orcl/pdb2/pdb2_users01.dbf
/oracle/product/12.0.1/oradata/orcl/pdb3/system01.dbf
/oracle/product/12.0.1/oradata/orcl/pdb3/sysaux01.dbf
/oracle/product/12.0.1/oradata/orcl/pdb3/pdb3_users01.dbf
15行が選択されました。
SQL> col component format a20
SQL> select component, current_size curr_size, min_size, max_size,user_specified_size uss, granule_size gs from v$memory_dynamic_components where current_size > 0;
COMPONENT CURR_SIZE MIN_SIZE MAX_SIZE USS GS
-------------------- ---------- ---------- ---------- ---------- ----------
shared pool 419430400 419430400 419430400 0 16777216
large pool 33554432 33554432 150994944 0 16777216
java pool 16777216 16777216 16777216 0 16777216
SGA Target 2030043136 2030043136 2030043136 0 16777216
DEFAULT buffer cache 1526726656 1409286144 1526726656 0 16777216
PGA Target 1375731712 1375731712 1375731712 0 16777216
6行が選択されました。
==================================================================
次に、PDBで各種ファイルを確認する。
==================================================================
$ more tnsnames.ora
# tnsnames.ora Network Configuration File: /oracle/product/12.0.1/OraHome1/network/admin/tnsnames.ora
# Generated by Oracle configuration tools.
LISTENER_ORCL =
(ADDRESS = (PROTOCOL = TCP)(HOST = sol10-oracle3)(PORT = 1521))
ORCL =
(DESCRIPTION =
(ADDRESS = (PROTOCOL = TCP)(HOST = sol10-oracle3)(PORT = 1521))
(CONNECT_DATA =
(SERVER = DEDICATED)
(SERVICE_NAME = orcl)
)
)
SRV_PDB1=
(DESCRIPTION =
(ADDRESS = (PROTOCOL = TCP )(HOST = sol10-oracle3)(PORT = 1521))
(CONNECT_DATA =
(SERVER = DEDICATED)
(SERVICE_NAME = pdb1)
)
)
~ 省略 ~
% sqlplus system/sol10-oracle3@SRV_PDB1
SQL*Plus: Release 12.1.0.1.0 Production on 月 9月 2 22:22:14 2013
Copyright (c) 1982, 2013, Oracle. All rights reserved.
Oracle Database 12c Enterprise Edition Release 12.1.0.1.0 - 64bit Production
With the Partitioning, OLAP, Advanced Analytics and Real Application Testing options
に接続されました。
SQL> alter session set container=pdb1;
セッションが変更されました。
SQL> startup
プラガブル・データベースがオープンされました。SQL>
SQL> select member from v$logfile;
MEMBER
--------------------------------------------------------------------------------/oracle/product/12.0.1/oradata/orcl/redo03.log
/oracle/product/12.0.1/oradata/orcl/redo02.log
/oracle/product/12.0.1/oradata/orcl/redo01.log
SQL> select name from v$archived_log;
NAME
--------------------------------------------------------------------------------/oracle/product/12.0.1/fast_recovery_area/ORCL/archivelog/2013_09_01/o1_mf_1_12_924y657l_.arc
/oracle/product/12.0.1/fast_recovery_area/ORCL/archivelog/2013_09_01/o1_mf_1_13_924y7cbt_.arc
/oracle/product/12.0.1/fast_recovery_area/ORCL/archivelog/2013_09_01/o1_mf_1_14_924y8882_.arc
/oracle/product/12.0.1/fast_recovery_area/ORCL/archivelog/2013_09_01/o1_mf_1_15_9250wpq1_.arc
NAME
--------------------------------------------------------------------------------
/oracle/product/12.0.1/fast_recovery_area/ORCL/archivelog/2013_09_01/o1_mf_1_16_9254bbvm_.arc
/oracle/product/12.0.1/fast_recovery_area/ORCL/archivelog/2013_09_01/o1_mf_1_17_925x1srm_.arc
/oracle/product/12.0.1/fast_recovery_area/ORCL/archivelog/2013_09_02/o1_mf_1_18_9293r1l4_.arc
/oracle/product/12.0.1/fast_recovery_area/ORCL/archivelog/2013_09_02/o1_mf_1_19_
NAME
--------------------------------------------------------------------------------9293xllx_.arc
/oracle/product/12.0.1/fast_recovery_area/ORCL/archivelog/2013_09_02/o1_mf_1_20_9293zorg_.arc
/oracle/product/12.0.1/fast_recovery_area/ORCL/archivelog/2013_09_02/o1_mf_1_21_92942517_.arc
10行が選択されました。
SQL> select name from v$datafile;
NAME
--------------------------------------------------------------------------------/oracle/product/12.0.1/oradata/orcl/undotbs01.dbf
/oracle/product/12.0.1/oradata/orcl/pdb3/system01.dbf
/oracle/product/12.0.1/oradata/orcl/pdb3/sysaux01.dbf
/oracle/product/12.0.1/oradata/orcl/pdb3/pdb3_users01.dbf
SQL> col component format a20
SQL> select component, current_size curr_size, min_size, max_size,user_specified_size uss, granule_size gs from v$memory_dynamic_components where current_size > 0;
COMPONENT CURR_SIZE MIN_SIZE MAX_SIZE USS GS
-------------------- ---------- ---------- ---------- ---------- ----------
shared pool 419430400 419430400 419430400 0 16777216
large pool 33554432 33554432 150994944 0 16777216
java pool 16777216 16777216 16777216 0 16777216
SGA Target 2030043136 2030043136 2030043136 0 16777216
DEFAULT buffer cache 1426063360 1409286144 1526726656 0 16777216
Shared IO Pool 100663296 0 100663296 0 16777216
PGA Target 1375731712 1375731712 1375731712 0 16777216
6行が選択されました。
==================================================================
<まとめ>
・REDOログ、アーカイブログ、SGA/PGAはCDBとPDBで共用。
・データファイルはCDBとPDBで別。CDB接続時はPDB側の情報が閲覧可能だが、PDB接続時は当該PDBのみの情報のみ閲覧可能。
Solaris 10 ZFS
bash-3.2# zpool create rpool c2t0d0 c2t1d0
bash-3.2# zfs list
NAME USED AVAIL REFER MOUNTPOINT
rpool 79K 31.3G 31K /rpool
bash-3.2# zfs create rpool/storage1
bash-3.2# zfs create rpool/storage2
bash-3.2# zfs create rpool/storage3
bash-3.2# df -k
ファイルシステム kbytes 使用済み 使用可能 容量 マウント先
/dev/dsk/c0d0s0 21177107 11497054 9468282 55% /
/devices 0 0 0 0% /devices
ctfs 0 0 0 0% /system/contract
proc 0 0 0 0% /proc
mnttab 0 0 0 0% /etc/mnttab
swap 16170508 996 16169512 1% /etc/svc/volatile
objfs 0 0 0 0% /system/object
sharefs 0 0 0 0% /etc/dfs/sharetab
/usr/lib/libc/libc_hwcap1.so.1
21177107 11497054 9468282 55% /lib/libc.so.1
fd 0 0 0 0% /dev/fd
swap 16169624 112 16169512 1% /tmp
swap 16169552 40 16169512 1% /var/run
/dev/dsk/c0d1s7 20599663 12393044 8000623 61% /oracle
/hgfs 16777215 4096 16772864 1% /hgfs
/tmp/VMwareDnD 0 0 0 0% /var/run/vmblock
/dev/lofi/1 2201236 2201236 0 100% /mnt
rpool 32772096 33 32771883 1% /rpool
rpool/storage1 32772096 31 32771883 1% /rpool/storage1
rpool/storage2 32772096 31 32771883 1% /rpool/storage2
rpool/storage3 32772096 31 32771883 1% /rpool/storage3
bash-3.2# zonecfg -z testZone1
testZone1: そのような構成済みゾーンはありません
'create' を使用して、新しいゾーンの構成を開始してください。
zonecfg:testZone1> create
zonecfg:testZone1> set zonepath=/rpool/storage1
zonecfg:testZone1> add net
zonecfg:testZone1:net> set physical=e1000g0
zonecfg:testZone1:net> set address=172.168.20.13
zonecfg:testZone1:net> end
zonecfg:testZone1> set autoboot=true
zonecfg:testZone1> info
zonename: testZone1
zonepath: /rpool/storage1
brand: native
autoboot: true
bootargs:
pool:
limitpriv:
scheduling-class:
ip-type: shared
hostid:
inherit-pkg-dir:
dir: /lib
inherit-pkg-dir:
dir: /platform
inherit-pkg-dir:
dir: /sbin
inherit-pkg-dir:
dir: /usr
net:
address: 172.168.20.13
physical: e1000g0
defrouter が指定されていません
zonecfg:testZone1> export
create -b
set zonepath=/rpool/storage1
set autoboot=true
set ip-type=shared
add inherit-pkg-dir
set dir=/lib
end
add inherit-pkg-dir
set dir=/platform
end
add inherit-pkg-dir
set dir=/sbin
end
add inherit-pkg-dir
set dir=/usr
end
add net
set address=172.168.20.13
set physical=e1000g0
end
zonecfg:testZone1> verify
zonecfg:testZone1> exit
bash-3.2# zoneadm list -vc
ID NAME STATUS PATH BRAND IP
0 global running / native shared
- testZone1 configured /rpool/storage1 native shared
bash-3.2# chmod 700 storage1
bash-3.2# zoneadm -z testZone1 install
ZFS データセット rpool/storage1 を作成できません: dataset already exists
Preparing to install zone <testZone1>.
Creating list of files to copy from the global zone.
Copying <2908> files to the zone.
Initializing zone product registry.
Determining zone package initialization order.
Preparing to initialize <1225> packages on the zone.
Initialized <1225> packages on zone.
Zone <testZone1> is initialized.
ファイル </rpool/storage1/root/var/sadm/system/logs/install_log> には、ゾーンの インストールのログが含まれています。
bash-3.2# zoneadm -z testZone1 boot
bash-3.2# zlogin -C testZone1
[ゾーン 'testZone1' コンソールに接続しました]
Select a Language
0. English
1. Japanese
Please make a choice (0 - 1), or press h or ? for help:1
Select a Locale
0. Japanese EUC (ja)
1. Japanese EUC (ja_JP.eucJP)
2. Japanese PC Kanji (ja_JP.PCK)
3. Japanese UTF-8 (ja_JP.UTF-8)
4. Go Back to Previous Screen
Please make a choice (0 - 4), or press h or ? for help: 0
どのタイプの端末を使用していますか?
1) ANSI 標準 CRT
2) DEC VT52
3) DEC VT100
4) Heathkit 19
5) Lear Siegler ADM31
6) PC コンソール
7) Sun コマンドツール
8) Sun ワークステーション
9) Televideo 910
10) Televideo 925
11) Wyse Model 50
12) X 端末エミュレータ (xterms)
13) CDE 端末エミュレータ (dtterm)
14) その他
選択する番号を入力して、Return キーを押してください。12
Creating new rsa public/private host key pair
Creating new dsa public/private host key pair
Configuring network interface addresses: e1000g0.
─ Host Name for e1000g0:1 ──────────────────────────────────────────────────────
Enter the host name which identifies this system on the network. The name
must be unique within your domain; creating a duplicate host name will cause
problems on the network after you install Solaris.
A host name must have at least one character; it can contain letters,
digits, and minus signs (-).
Host name for e1000g0:1 sol10-oracle3-1
> Press F2 to go to the next screen.
──────────────────────────────────────────────────────────────────────────────── F2_Continue F6_Help
─ Confirm Information for e1000g0:1 ────────────────────────────────────────────
> Confirm the following information. If it is correct, press F2;
to change any information, press F4.
Host name: sol10-oracle3-1
──────────────────────────────────────────────────────────────────────────────── Esc-2_Continue Esc-4_Change Esc-6_Help
─ Configure Security Policy: ───────────────────────────────────────────────────
Specify Yes if the system will use the Kerberos security mechanism.
Specify No if this system will use standard UNIX security.
Configure Kerberos Security
───────────────────────────
[ ] Yes
[X] No
──────────────────────────────────────────────────────────────────────────────── Esc-2_Continue Esc-6_Help
─ Confirm Information ──────────────────────────────────────────────────────────
> Confirm the following information. If it is correct, press F2;
to change any information, press F4.
Configure Kerberos Security: No
──────────────────────────────────────────────────────────────────────────────── Esc-2_Continue Esc-4_Change Esc-6_Help
─ Name Service ─────────────────────────────────────────────────────────────────
On this screen you must provide name service information. Select the name
service that will be used by this system, or None if your system will either
not use a name service at all, or if it will use a name service not listed
here.
> To make a selection, use the arrow keys to highlight the option
and press Return to mark it [X].
Name service
────────────
[ ] NIS+
[ ] NIS
[ ] DNS
[ ] LDAP
[X] None
──────────────────────────────────────────────────────────────────────────────── Esc-2_Continue Esc-6_Help
─ Confirm Information ──────────────────────────────────────────────────────────
> Confirm the following information. If it is correct, press F2;
to change any information, press F4.
Name service: None
──────────────────────────────────────────────────────────────────────────────── Esc-2_Continue Esc-4_Change Esc-6_Help
─ NFSv4 Domain Name ────────────────────────────────────────────────────────────
NFS version 4 uses a domain name that is automatically derived from the
system's naming services. The derived domain name is sufficient for most
configurations. In a few cases, mounts that cross domain boundaries might
cause files to appear to be owned by "nobody" due to the lack of a common
domain name.
The current NFSv4 default domain is: ""
NFSv4 Domain Configuration
──────────────────────────────────────────────
[X] Use the NFSv4 domain derived by the system
[ ] Specify a different NFSv4 domain
──────────────────────────────────────────────────────────────────────────────── Esc-2_Continue Esc-6_Help
─ Confirm Information for NFSv4 Domain ─────────────────────────────────────────
> Confirm the following information. If it is correct, press F2;
to change any information, press F4.
NFSv4 Domain Name: << Value to be derived dynamically >>
──────────────────────────────────────────────────────────────────────────────── Esc-2_Continue Esc-4_Change Esc-6_Help
─ Time Zone ────────────────────────────────────────────────────────────────────
On this screen you must specify your default time zone. You can specify a
time zone in three ways: select one of the continents or oceans from the
list, select other - offset from GMT, or other - specify time zone file.
> To make a selection, use the arrow keys to highlight the option and
press Return to mark it [X].
Continents and Oceans
──────────────────────────────────
- [ ] Africa
│ [ ] Americas
│ [ ] Antarctica
│ [ ] Arctic Ocean
│ [X] Asia
│ [ ] Atlantic Ocean
│ [ ] Australia
│ [ ] Europe
v [ ] Indian Ocean
──────────────────────────────────────────────────────────────────────────────── Esc-2_Continue Esc-6_Help
─ Country or Region ────────────────────────────────────────────────────────────
> To make a selection, use the arrow keys to highlight the option and
press Return to mark it [X].
Countries and Regions
────────────────────────
^ [ ] Georgia
│ [ ] Hong Kong
│ [ ] India
│ [ ] Indonesia
│ [ ] Iran
│ [ ] Iraq
│ [ ] Israel
│ [X] Japan
│ [ ] Jordan
│ [ ] Kazakhstan
│ [ ] Korea (North)
│ [ ] Korea (South)
v [ ] Kuwait
──────────────────────────────────────────────────────────────────────────────── Esc-2_Continue Esc-6_Help
─ Confirm Information ──────────────────────────────────────────────────────────
> Confirm the following information. If it is correct, press F2;
to change any information, press F4.
Time zone: Japan
──────────────────────────────────────────────────────────────────────────────── Esc-2_Continue Esc-4_Change Esc-6_Help
─ Root Password ────────────────────────────────────────────────────────────────
Please enter the root password for this system.
The root password may contain alphanumeric and special characters. For
security, the password will not be displayed on the screen as you type it.
> If you do not want a root password, leave both entries blank.
Root password: ***************
Root password: ***************
──────────────────────────────────────────────────────────────────────────────── Esc-2_Continue Esc-6_Help
rebooting system due to change(s) in /etc/default/init
[注意: ゾーンをリブートしています]
SunOS Release 5.10 Version Generic_147441-01 64-bit
Copyright (c) 1983, 2011, Oracle and/or its affiliates. All rights reserved.
Hostname: sol10-oracle3-1
sol10-oracle3-1 console login:
2013年9月1日日曜日
Oracle12cのインストール
<準備その1>
VMwarePlayerで以下のOSをインストールする。
・パーティション
ハードディスク1つ目
/ は20GB
swapは10GB
ハードディスク2つ目
/oracleは20GB
・メモリは8GB
<準備その2>
インストール前に以下の作業を行う。
# vi /etc/system
set noexec_user_stack = 1
set semsys:seminfo_semmns = 1024
set semsys:seminfo_semvmx = 32767
# projadd -K "project.max-shm-memory=(privileged,4294967296,deny)" user.oracle
★4294967295ではなく、4294967296
# projmod -a -K "project.max-sem-ids=(privileged,100,deny)" user.oracle
# projmod -a -K "process.max-sem-nsems=(privileged,256,deny)" user.oracle
# projmod -a -K "project.max-shm-ids=(privileged,100,deny)" user.oracle
# shutdown -y -i6 -g0
★SUNWeu8osというUTF-8関連のパッケージがなければ、インストールしておく。
<準備その3>
・oinstallグループおよびdbaグループを作成する。
# /usr/sbin/groupadd oinstall
# /usr/sbin/groupadd dba
・oracleユーザーを作成する。
すでにoracleユーザーが存在するかを確認する。
# id oracle
出力例:uid=100(oracle) gid=100(oinstall) groups=101(dba)
oracleユーザーが存在しなければ次のコマンドで作成する。
# /usr/sbin/useradd -g oinstall -G dba oracle
すでにoracleユーザーが存在していて、プライマリグループがoinstallではないか、dbaグループのメンバーでない場合は、以下のコマンドで必要なグループを指定する。
# /usr/sbin/usermod -g oinstall -G dba oracle
・oracleユーザーのパスワードを設定する。
# passwd oracle
・oracleユーザーのホームディレクトリを作成する。
# mkdir -p /export/home/oracle
# chown oracle:oinstall /export/home/oracle
solaris.x64_12cR1_database_1of2.zipとsolaris.x64_12cR1_database_2of2.zipをOracle社のサイトからダウンロードし、Oracleユーザで両ファイルとも解凍する。次にOracleユーザでコンソールにログインする。
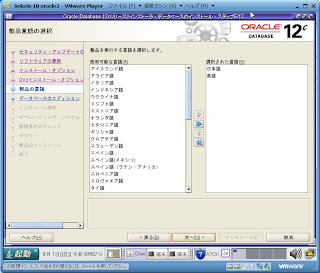
・x86版のサーバ製品インストール
% ./runInstaller


・root.shの実行 ※oracleInventoryがない場合、orainstRoot.shの実行もある。
# /oracle/product/12.0.1/OraHome1/root.sh
Performing root user operation for Oracle 12c
The following environment variables are set as:
ORACLE_OWNER= oracle
ORACLE_HOME= /oracle/product/12.0.1/OraHome1
Enter the full pathname of the local bin directory: [/usr/local/bin]:
The contents of "dbhome" have not changed. No need to overwrite.
The file "oraenv" already exists in /usr/local/bin. Overwrite it? (y/n) [n]: y
Copying oraenv to /usr/local/bin ...
The file "coraenv" already exists in /usr/local/bin. Overwrite it? (y/n) [n]: y Copying coraenv to /usr/local/bin ...
Entries will be added to the /var/opt/oracle/oratab file as needed by
Database Configuration Assistant when a database is created
Finished running generic part of root script.
Now product-specific root actions will be performed.
 ・Net Configuration Assistant
% $ORACLE_HOME/bin/netca
・Net Configuration Assistant
% $ORACLE_HOME/bin/netca


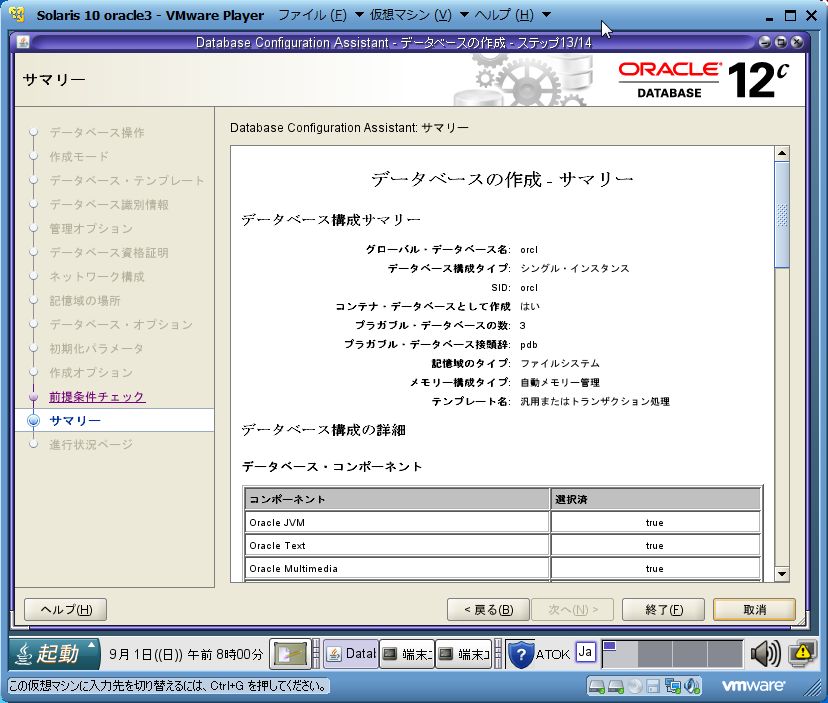
・Database Configuration Assistant
% $ORACLE_HOME/bin/dbca


・Enterprise Manager Express
% sqlplus /nolog
SQL*Plus: Release 12.1.0.1.0 Production on 日 9月 1 11:31:19 2013
Copyright (c) 1982, 2013, Oracle. All rights reserved.
SQL> connect /as sysdba
接続されました。
SQL> exec DBMS_XDB_CONFIG.SETHTTPSPORT(5500);
PL/SQLプロシージャが正常に完了しました。
SQL> quit
Oracle Database 12c Enterprise Edition Release 12.1.0.1.0 - 64bit Production
With the Partitioning, OLAP, Advanced Analytics and Real Application Testing optionsとの接続が切断されました。
% netstat -a|grep 5500
*.5500 *.* 0 0 49152 0 LISTEN
*.5500 *.* 0 0 49152 0 LISTEN
★5500/tcpが起動していることを確認する。
Webブラウザでhttps://FQDNまたはIPアドレス:5500/emへアクセスする。


VMwarePlayerで以下のOSをインストールする。
・パーティション
ハードディスク1つ目
/ は20GB
swapは10GB
ハードディスク2つ目
/oracleは20GB
・メモリは8GB
<準備その2>
インストール前に以下の作業を行う。
# vi /etc/system
set noexec_user_stack = 1
set semsys:seminfo_semmns = 1024
set semsys:seminfo_semvmx = 32767
# projadd -K "project.max-shm-memory=(privileged,4294967296,deny)" user.oracle
★4294967295ではなく、4294967296
# projmod -a -K "project.max-sem-ids=(privileged,100,deny)" user.oracle
# projmod -a -K "process.max-sem-nsems=(privileged,256,deny)" user.oracle
# projmod -a -K "project.max-shm-ids=(privileged,100,deny)" user.oracle
# shutdown -y -i6 -g0
★SUNWeu8osというUTF-8関連のパッケージがなければ、インストールしておく。
<準備その3>
・oinstallグループおよびdbaグループを作成する。
# /usr/sbin/groupadd oinstall
# /usr/sbin/groupadd dba
・oracleユーザーを作成する。
すでにoracleユーザーが存在するかを確認する。
# id oracle
出力例:uid=100(oracle) gid=100(oinstall) groups=101(dba)
oracleユーザーが存在しなければ次のコマンドで作成する。
# /usr/sbin/useradd -g oinstall -G dba oracle
すでにoracleユーザーが存在していて、プライマリグループがoinstallではないか、dbaグループのメンバーでない場合は、以下のコマンドで必要なグループを指定する。
# /usr/sbin/usermod -g oinstall -G dba oracle
・oracleユーザーのパスワードを設定する。
# passwd oracle
・oracleユーザーのホームディレクトリを作成する。
# mkdir -p /export/home/oracle
# chown oracle:oinstall /export/home/oracle
solaris.x64_12cR1_database_1of2.zipとsolaris.x64_12cR1_database_2of2.zipをOracle社のサイトからダウンロードし、Oracleユーザで両ファイルとも解凍する。次にOracleユーザでコンソールにログインする。
・x86版のサーバ製品インストール
% ./runInstaller


・root.shの実行 ※oracleInventoryがない場合、orainstRoot.shの実行もある。
# /oracle/product/12.0.1/OraHome1/root.sh
Performing root user operation for Oracle 12c
The following environment variables are set as:
ORACLE_OWNER= oracle
ORACLE_HOME= /oracle/product/12.0.1/OraHome1
Enter the full pathname of the local bin directory: [/usr/local/bin]:
The contents of "dbhome" have not changed. No need to overwrite.
The file "oraenv" already exists in /usr/local/bin. Overwrite it? (y/n) [n]: y
Copying oraenv to /usr/local/bin ...
The file "coraenv" already exists in /usr/local/bin. Overwrite it? (y/n) [n]: y Copying coraenv to /usr/local/bin ...
Entries will be added to the /var/opt/oracle/oratab file as needed by
Database Configuration Assistant when a database is created
Finished running generic part of root script.
Now product-specific root actions will be performed.


・Enterprise Manager Express
% sqlplus /nolog
SQL*Plus: Release 12.1.0.1.0 Production on 日 9月 1 11:31:19 2013
Copyright (c) 1982, 2013, Oracle. All rights reserved.
SQL> connect /as sysdba
接続されました。
SQL> exec DBMS_XDB_CONFIG.SETHTTPSPORT(5500);
PL/SQLプロシージャが正常に完了しました。
SQL> quit
Oracle Database 12c Enterprise Edition Release 12.1.0.1.0 - 64bit Production
With the Partitioning, OLAP, Advanced Analytics and Real Application Testing optionsとの接続が切断されました。
% netstat -a|grep 5500
*.5500 *.* 0 0 49152 0 LISTEN
*.5500 *.* 0 0 49152 0 LISTEN
★5500/tcpが起動していることを確認する。
Webブラウザでhttps://FQDNまたはIPアドレス:5500/emへアクセスする。


登録:
投稿 (Atom)